政府网站建设可行性研究报告 baidu市场调研报告word模板
文章目录
- 没有线程常驻会怎么样?
- 线程常驻
- 线程保活
没有线程常驻会怎么样?
我们一般写一个子线程,子线程执行完分配的任务后就会自动销毁,比如下面这个情况:
我们先重写一下NSThread里面的dealloc方法,打印什么时候会调用dealloc方法。
#import "NSThread+NewDealloc.h"@implementation NSThread (NewDealloc)
- (void)dealloc {NSLog(@"%s", __func__);
}
@end
在ViewController里调用方法:
@implementation FirstViewController- (void)viewDidLoad {[super viewDidLoad];NSThread *thread = [[NSThread alloc] initWithTarget:self selector:@selector(doSomeThing) object:nil];[thread start];
}
- (void)doSomeThing {NSLog(@"%s", __func__);
}
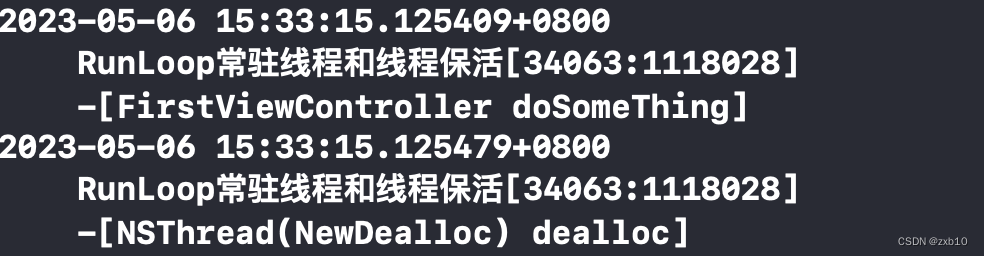
根据打印结果我们可以看到,在子线程执行完任务后线程自动销毁。
而我们有时会需要经常在一个子线程中执行任务,频繁的创建和销毁线程就会造成资源浪费,这时候就要用到RunLoop来使线程长时间存活了
线程常驻
开发应用程序的过程中,如果后台操作十分频繁,比如后台播放音乐、下载文件等等,我们希望这条线程永远常驻内存
我们可以添加一条用于常驻内存的强引用子线程,在该线程的RunLoop下添加一个Sources,开启RunLoop
@interface FirstViewController ()
@property (nonatomic, strong) NSThread *thread;
@end
self.thread = [[NSThread alloc] initWithTarget:self selector:@selector(run1) object:nil];[self.thread start];
- (void)run1 {NSLog(@"----run1-----");/*如果不加这句,会发现runloop创建出来就挂了,因为runloop如果没有CFRunLoopSourceRef事件源输入或者定时器,就会立马消亡。下面的方法给runloop添加一个NSport,就是添加一个事件源,也可以添加一个定时器,或者observer,让runloop不会挂掉*/[[NSRunLoop currentRunLoop] addPort:[NSPort port] forMode:NSDefaultRunLoopMode];// 方法1 ,2,3实现的效果相同,让runloop无限期运行下去// 方法2
//    [[NSRunLoop currentRunLoop] runMode:NSDefaultRunLoopMode beforeDate:[NSDate distantFuture]];// 方法3
//    [[NSRunLoop currentRunLoop] runUntilDate:[NSDate distantFuture]];[[NSRunLoop currentRunLoop] run];// 测试是否开启了RunLoop,如果开启RunLoop,则来不了这里,因为RunLoop开启了循环。NSLog(@"未开启RunLoop");
}- (void)touchesBegan:(NSSet<UITouch *> *)touches withEvent:(UIEvent *)event {// 利用performSelector,在self.thread的线程中调用run2方法执行任务[self performSelector:@selector(run2) onThread:self.thread withObject:nil waitUntilDone:NO];
}- (void)run2 {NSLog(@"----run2------");
}
无论点击屏幕多少次都不会dealloc线程。
我们必须保证线程不消亡,才可以在后台接受时间处理,所以如果没有实现添加NSPort或者NSTimer,会发现执行完run方法,线程就会消亡,后续再执行touchbegan方法无效。
实现了上面三个方法之一,就可以发现执行完了run方法,这个时候再点击屏幕,可以不断执行test方法,因为线程self.thread一直常驻后台,等待事件加入其中,然后执行。
线程保活
RunLoop的启动和关闭方法在上一篇博客的最后讲过【iOS】—— RunLoop初学
我们直奔主题:
通过以上关于RunLoop启动和关闭的方法分析,我们大概有这样一个思路:
- 我们想要控制RunLoop,就需要使用runMode:beforeDate:方法,因为其他两种方法一个无法停止一个只能依赖超时机制
- CFRunLoopStop() 方法只会结束当前的一次的runMode:beforeDate:方法调用,我们必须再做点什么
针对以上疑问,有以下解答:
- 首先,因为runMode:beforeDate:方法是单次调用,我们需要给它加上一个循环,否则调用一次就over了,和不使用RunLoop的效果大同小异
- 这个循环的条件可以默认设置为YES,当调用stop方法时,执行CFRunLoopStop() 方法并且将循环条件改为NO,就可以使循环停止,RunLoop退出
#import "SecondViewController.h"@interface SecondViewController ()
@property (nonatomic, strong) NSThread *aThread;
@property (nonatomic, assign) BOOL stopped;
@end@implementation SecondViewController- (void)viewDidLoad {[super viewDidLoad];self.view.backgroundColor = [UIColor whiteColor];// 添加一个停止RunLoop的按钮UIButton *stopButton = [UIButton buttonWithType:UIButtonTypeRoundedRect];[self.view addSubview:stopButton];stopButton.frame = CGRectMake(180, 180, 100, 50);stopButton.titleLabel.font = [UIFont systemFontOfSize:20];[stopButton setTitle:@"stop" forState:UIControlStateNormal];stopButton.tintColor = [UIColor blueColor];[stopButton addTarget:self action:@selector(stop) forControlEvents:UIControlEventTouchUpInside];// 用于返回的按钮UIButton *backButton = [UIButton buttonWithType:UIButtonTypeRoundedRect];[self.view addSubview:backButton];backButton.frame = CGRectMake(180, 380, 100, 50);backButton.titleLabel.font = [UIFont systemFontOfSize:20];[backButton setTitle:@"back" forState:UIControlStateNormal];backButton.tintColor = [UIColor orangeColor];[backButton addTarget:self action:@selector(back) forControlEvents:UIControlEventTouchUpInside];self.stopped = NO;__weak typeof(self) weakSelf = self;self.aThread = [[NSThread alloc] initWithBlock:^{NSLog(@"go");[[NSRunLoop currentRunLoop] addPort:[[NSPort alloc] init] forMode:NSDefaultRunLoopMode];while (!weakSelf.stopped) {[[NSRunLoop currentRunLoop] runMode:NSDefaultRunLoopMode beforeDate:[NSDate distantFuture]];}NSLog(@"ok");}];[self.aThread start];
}- (void)touchesBegan:(NSSet<UITouch *> *)touches withEvent:(UIEvent *)event {[self performSelector:@selector(doSomething) onThread:self.aThread withObject:nil waitUntilDone:NO];
}// 子线程需要执行的任务
- (void)doSomething {NSLog(@"%s %@", __func__, [NSThread currentThread]);
}- (void)stop {// 在子线程调用stopif (self.aThread) {// 在子线程调用stop[self performSelector:@selector(stopThread) onThread:self.aThread withObject:nil waitUntilDone:YES];}
}// 用于停止子线程的RunLoop
- (void)stopThread {// 设置标记为NOself.stopped = YES;// 停止RunLoopCFRunLoopStop(CFRunLoopGetCurrent());NSLog(@"%s %@", __func__, [NSThread currentThread]);self.aThread = nil;
}- (void)dealloc {NSLog(@"%s", __func__);
}- (void)back {[self stop];[self dismissViewControllerAnimated:YES completion:nil];
}
@end
需要注意的一点是,如果我们的ViewController已经被销毁了,线程并没有死,这就造成了内存泄漏了。所以我们要注意,在ViewController被dealloc之前,先stop线程。
