微信制作软件seo公司软件
文章目录
- 概要
- 实例一:硬币分割计数
- 实例二:玉米粒分割计数
概要
在当今数字图像处理领域,图像分割技术是一项至关重要的任务。图像分割旨在将图像中的不同目标或区域准确地分开,为计算机视觉、图像识别和机器学习等领域提供了坚实的基础。在图像分割的广泛应用中,二值化、形态学预处理、距离变换以及分水岭算法等技术被广泛探讨和应用。
首先,二值化技术通过将灰度图像转化为黑白图像,为分割算法提供了清晰的背景和前景。其次,形态学预处理通过腐蚀、膨胀等操作,清除噪声、连接物体,为后续处理提供了更加准确的图像。接着,距离变换技术能够量化地描述图像中各个像素点与目标的距离关系,为图像分析提供了重要依据。最后,分水岭算法则是一种高度智能的分割技术,通过模拟水流形成分割边界,解决了复杂目标重叠和交叉的挑战。
实例一:硬币分割计数
导入必要的库:
from skimage.feature import peak_local_max
from skimage.morphology import watershed
from scipy import ndimage
import numpy as np
import argparse
import imutils
import cv2
加载并预处理图像:
image = cv2.imread("1.jpg")
shifted = cv2.pyrMeanShiftFiltering(image, 21, 51)
cv2.imshow("Input", image)
这里使用了均值迁移滤波(Mean Shift Filtering)来平滑图像,使得图像中的区域更加集中,有助于后续的阈值处理。
将图像转换为灰度图,然后进行二值化处理:
gray = cv2.cvtColor(shifted, cv2.COLOR_BGR2GRAY)
thresh = cv2.threshold(gray, 0, 255, cv2.THRESH_BINARY | cv2.THRESH_OTSU)[1]
cv2.imshow("Thresh", thresh)
这里使用了Otsu的阈值处理方法,将灰度图转换为二值图。
计算距离变换并找到峰值:
D = ndimage.distance_transform_edt(thresh)
localMax = peak_local_max(D, indices=False, min_distance=10, labels=thresh)
这一步计算了二值化图像的距离变换(Euclidean Distance Transform),然后找到了距离图中的峰值点。
应用分水岭算法进行图像分割:
markers = ndimage.label(localMax, structure=np.ones((3, 3)))[0]
labels = watershed(-D, markers, mask=thresh)
这里使用了分水岭算法,通过标记(markers)和掩码(mask)将图像分割成不同的区域。
分割结果的后处理:
for label in np.unique(labels):# if the label is zero, we are examining the 'background'# so simply ignore itif label == 0:continue# otherwise, allocate memory for the label region and draw# it on the maskmask = np.zeros(gray.shape, dtype="uint8")mask[labels == label] = 255# detect contours in the mask and grab the largest onecnts = cv2.findContours(mask.copy(), cv2.RETR_EXTERNAL,cv2.CHAIN_APPROX_SIMPLE)cnts = imutils.grab_contours(cnts)c = max(cnts, key=cv2.contourArea)# draw a circle enclosing the object((x, y), r) = cv2.minEnclosingCircle(c)cv2.circle(image, (int(x), int(y)), int(r), (0, 255, 0), 2)cv2.putText(image, "{}".format(label), (int(x) - 10, int(y)),cv2.FONT_HERSHEY_SIMPLEX, 0.6, (0, 0, 255), 2)
在这个循环中,对分水岭算法得到的每个区域进行处理,找到每个区域的轮廓,然后用圆圈标注出物体的轮廓,并在标注中显示区域的标签。
显示最终的分割结果:
cv2.imshow("Output", image)cv2.waitKey(0)cv2.destroyAllWindows()
最终,代码将显示带有分割结果的原始图像。
这段代码演示了一个完整的图像分割流程,包括图像预处理、距离变换、分水岭算法的应用,以及对分割结果的后处理和可视化。
全部代码:
# import the necessary packages
from skimage.feature import peak_local_max
from scipy import ndimage
import numpy as np
import argparse
import imutils
import cv2
from skimage.morphology import watershed
# load the image and perform pyramid mean shift filtering
# to aid the thresholding step
image = cv2.imread("img.png")
shifted = cv2.pyrMeanShiftFiltering(image, 21, 51)
cv2.imshow("Input", image)# convert the mean shift image to grayscale, then apply
# Otsu's thresholding
gray = cv2.cvtColor(shifted, cv2.COLOR_BGR2GRAY)
thresh = cv2.threshold(gray, 0, 255,cv2.THRESH_BINARY | cv2.THRESH_OTSU)[1]
cv2.imshow("Thresh", thresh)# compute the exact Euclidean distance from every binary
# pixel to the nearest zero pixel, then find peaks in this
# distance map
D = ndimage.distance_transform_edt(thresh)
localMax = peak_local_max(D, indices=False, min_distance=10,labels=thresh)# perform a connected component analysis on the local peaks,
# using 8-connectivity, then appy the Watershed algorithm
markers = ndimage.label(localMax, structure=np.ones((3, 3)))[0]
labels = watershed(-D, markers, mask=thresh)
print("[INFO] {} unique segments found".format(len(np.unique(labels)) - 1))# loop over the unique labels returned by the Watershed
# algorithm
for label in np.unique(labels):# if the label is zero, we are examining the 'background'# so simply ignore itif label == 0:continue# otherwise, allocate memory for the label region and draw# it on the maskmask = np.zeros(gray.shape, dtype="uint8")mask[labels == label] = 255# detect contours in the mask and grab the largest onecnts = cv2.findContours(mask.copy(), cv2.RETR_EXTERNAL,cv2.CHAIN_APPROX_SIMPLE)cnts = imutils.grab_contours(cnts)c = max(cnts, key=cv2.contourArea)# draw a circle enclosing the object((x, y), r) = cv2.minEnclosingCircle(c)cv2.circle(image, (int(x), int(y)), int(r), (0, 255, 0), 2)cv2.putText(image, "{}".format(label), (int(x) - 10, int(y)),cv2.FONT_HERSHEY_SIMPLEX, 0.6, (0, 0, 255), 2)# show the output image
cv2.imshow("Output", image)
cv2.waitKey(0)
cv2.destroyAllWindows()
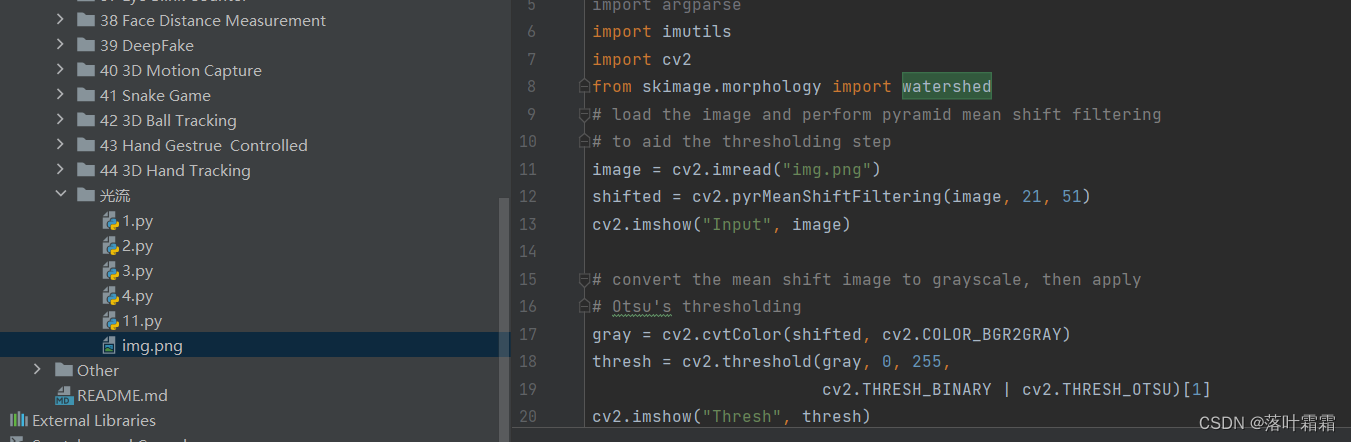
使用时候将图片放在同级目录,修改文件名字即可:
img.png,11行修改即可。
硬币图片自己随便找,复制图像截屏使用都可以:
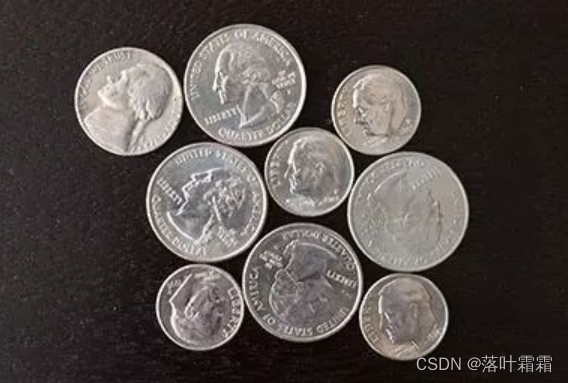
使用结果:
三张图片:

注意:
导入库函数的部分,这个skimage库函数的没有,需要下载全部名字。
在环境下载库函数
pip install scikit-image -i https://pypi.tuna.tsinghua.edu.cn/simple
如果导入成功,但是运行报错:
D:\anaconda\envs\yolov5\python.exe E:\yolo项目\Opencv-project-main\Opencv-project-main\CVZone\光流\11.py
Traceback (most recent call last):File "E:\yolo项目\Opencv-project-main\Opencv-project-main\CVZone\光流\11.py", line 26, in <module>localMax = peak_local_max(D, indices=False, min_distance=10,
TypeError: peak_local_max() got an unexpected keyword argument 'indices'Process finished with exit code 1
说明使用的peak_local_max函数的参数中含有indices,但该函数在较新的版本中已经没有该参数了。
这可能是由于scikit-image库版本过高导致的。检查scikit-image库版本是否为0.17.2或更高版本,如果是,可以将该库回退到0.16.2版本:
pip install scikit-image==0.16.2 -i https://pypi.tuna.tsinghua.edu.cn/simple
如果依然想要使用最新的scikit-image库,将indices参数删除并改用默认值即可,例如:
localMax = peak_local_max(D, min_distance=10,threshold_abs=threshold)
这样可以避免indices参数引起的错误。
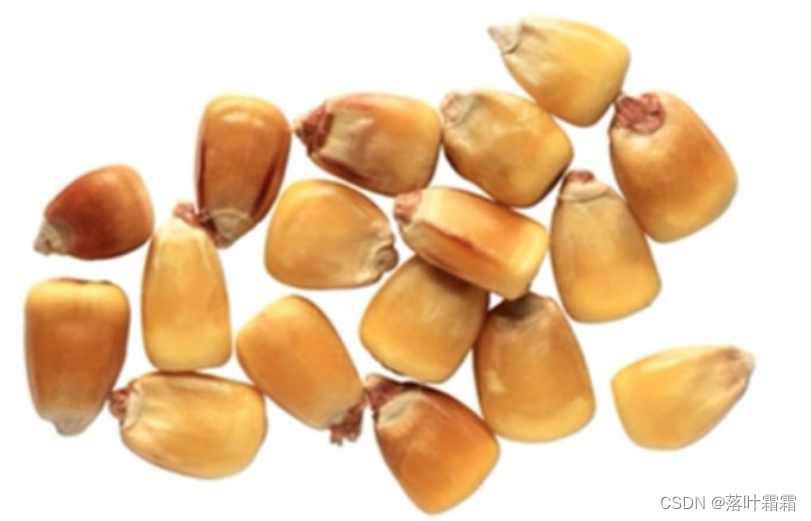
实例二:玉米粒分割计数
导入必要的库:
import numpy as np
import cv2
from matplotlib import pyplot as plt
读取图像并进行灰度化处理:
img = cv2.imread('5.jpg')
gray = cv2.cvtColor(img, cv2.COLOR_BGR2GRAY)
二值化处理:
ret, thresh = cv2.threshold(gray, 245, 255, cv2.THRESH_BINARY)
这一步将灰度图像转换为二值图像,其中灰度值大于等于245的像素被设为255(白色),小于245的像素被设为0(黑色)。
图像膨胀:
k = cv2.getStructuringElement(cv2.MORPH_RECT, (13, 13))
dilate = cv2.dilate(thresh, k, iterations=3)
通过膨胀操作,将二值图像中的物体区域扩大,便于后续处理。
距离变换:
cv2.bitwise_not(dilate, dilate)
dist_transform = cv2.distanceTransform(dilate, cv2.DIST_L2, 3)
dist = cv2.normalize(dist_transform, dist_transform, 0, 1.0, cv2.NORM_MINMAX)
这一步计算了图像中每个像素点到最近的背景像素的距离,得到了距离变换图。在这个图像中,物体的中心部分距离背景较远,而边缘部分距离背景较近。
二值化距离变换图:
dist = cv2.convertScaleAbs(dist)
ret2, morph = cv2.threshold(dist, 0.99, 255, cv2.THRESH_BINARY + cv2.THRESH_OTSU)
这一步将距离变换图二值化,得到了分割后的图像。
形态学开运算:
k2 = cv2.getStructuringElement(cv2.MORPH_RECT, (11, 5))
sure_fg = cv2.morphologyEx(morph, cv2.MORPH_OPEN, k2, iterations=1)
这一步通过形态学开运算去除小的噪点,保留大的物体区域。
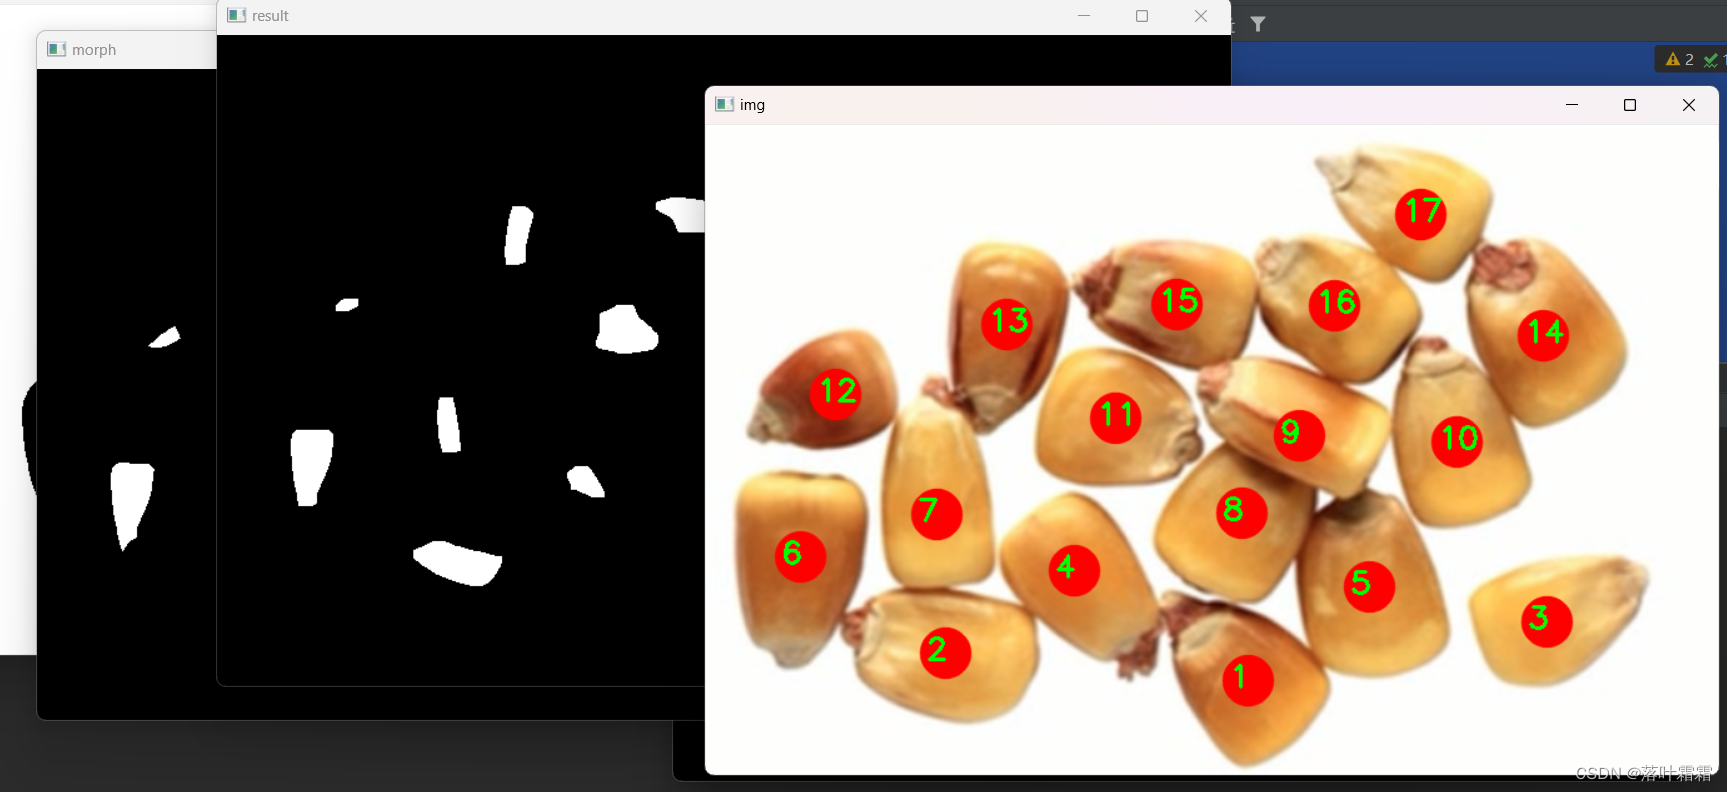
寻找轮廓并标注:
thresh, contours, hierarchy = cv2.findContours(sure_fg, cv2.RETR_EXTERNAL, cv2.CHAIN_APPROX_SIMPLE)
for i in range(0, len(contours)):(x, y, w, h) = cv2.boundingRect(contours[i])cv2.circle(img, (x + int(w / 2), y + int(h / 2)), 20, (0, 0, 255), -1, cv2.LINE_AA)cv2.putText(img, str(i + 1), (x + int(w / 2) - 15, y + int(h / 2) + 5), font, 0.8, (0, 255, 0), 2)
这一步使用cv2.findContours函数找到图像中的轮廓,然后绘制圆圈和文本标注在图像上,表示找到的物体区域。
显示和保存结果:
cv2.imshow('img', img)
cv2.waitKey(0)
cv2.destroyAllWindows()
最后,通过cv2.imshow显示处理后的图像。
全部代码:
import numpy as np
import cv2
from matplotlib import pyplot as pltfont = cv2.FONT_HERSHEY_SIMPLEXimg = cv2.imread('img_2.png')
gray = cv2.cvtColor(img, cv2.COLOR_BGR2GRAY)
ret, thresh = cv2.threshold(gray, 245, 255, cv2.THRESH_BINARY)
cv2.imshow("threshold", thresh)k = cv2.getStructuringElement(cv2.MORPH_RECT, (13, 13))
dilate = cv2.dilate(thresh, k, iterations=3)
cv2.imshow("dilate", dilate)cv2.bitwise_not(dilate, dilate)
dist_transform = cv2.distanceTransform(dilate, cv2.DIST_L2, 3)
dist = cv2.normalize(dist_transform, dist_transform, 0, 1.0, cv2.NORM_MINMAX)
cv2.imshow("distance", dist)
cv2.imwrite("dis.jpg", dist)# dist = np.uint8(dist)
dist = cv2.convertScaleAbs(dist)
ret2, morph = cv2.threshold(dist, 0.99, 255, cv2.THRESH_BINARY + cv2.THRESH_OTSU)
# ret2, morph = cv2.threshold(dist,0,255,cv2.THRESH_BINARY_INV)
cv2.imshow("morph", morph)k2 = cv2.getStructuringElement(cv2.MORPH_RECT, (11, 5))
sure_fg = cv2.morphologyEx(morph, cv2.MORPH_OPEN, k2, iterations=1)  # 形态开运算cv2.imshow("result", sure_fg)thresh, contours, hierarchy = cv2.findContours(sure_fg, cv2.RETR_EXTERNAL, cv2.CHAIN_APPROX_SIMPLE)
for i in range(0, len(contours)):(x, y, w, h) = cv2.boundingRect(contours[i])# cv2.drawContours(img,contours,i,(0,255,0),5)cv2.circle(img, (x + int(w / 2), y + int(h / 2)), 20, (0, 0, 255), -1, cv2.LINE_AA)cv2.putText(img, str(i + 1), (x + int(w / 2) - 15, y + int(h / 2) + 5), font, 0.8, (0, 255, 0), 2)cv2.imshow('img', img)
cv2.waitKey(0)
cv2.destroyAllWindows()
原图:
结果:
opencv版本不适配可能报错:
D:\anaconda\envs\yolov5\python.exe E:\yolo项目\Opencv-project-main\Opencv-project-main\CVZone\光流\22.py
Traceback (most recent call last):File "E:\yolo项目\Opencv-project-main\Opencv-project-main\CVZone\光流\22.py", line 33, in <module>thresh, contours, hierarchy = cv2.findContours(sure_fg, cv2.RETR_EXTERNAL, cv2.CHAIN_APPROX_SIMPLE)
ValueError: not enough values to unpack (expected 3, got 2)Process finished with exit code 1
解决办法:
降低版本参考:
降低版本参考:
替换:
contours, _ = cv2.findContours(sure_fg, cv2.RETR_EXTERNAL, cv2.CHAIN_APPROX_SIMPLE)
替换: