网站数据建设涉及哪些内容中国最新军事新闻最新消息
Io回顾
IoC 是 Inversion of Control 的简写,译为“控制反转”,它不是一门技术,而是一种设计思想,是一个重要的面向对象编程法则,能够指导我们如何设计出松耦合、更优良的程序。
Spring 通过 IoC 容器来管理所有 Java 对象的实例化和初始化,控制对象与对象之间的依赖关系。我们将由 IoC 容器管理的 Java 对象称为 Spring Bean,它与使用关键字 new 创建的 Java 对象没有任何区别。
IoC 容器是 Spring 框架中最重要的核心组件之一,它贯穿了 Spring 从诞生到成长的整个过程。
基础知识可以参考:
IoC基础
IoC引用外部属性文件
引入context的名称空间:
<?xml version="1.0" encoding="UTF-8"?>
<beans xmlns="http://www.springframework.org/schema/beans"xmlns:xsi="http://www.w3.org/2001/XMLSchema-instance"xmlns:context="http://www.springframework.org/schema/context"xsi:schemaLocation="http://www.springframework.org/schema/beanshttp://www.springframework.org/schema/beans/spring-beans.xsdhttp://www.springframework.org/schema/contexthttp://www.springframework.org/schema/context/spring-context.xsd"></beans>
引入jdbc的依赖:
 <!-- MySQL驱动 -->
<dependency><groupId>mysql</groupId><artifactId>mysql-connector-java</artifactId><version>8.0.30</version>
</dependency><!-- 数据源 -->
<dependency><groupId>com.alibaba</groupId><artifactId>druid</artifactId><version>1.2.15</version>
</dependency>
在resources中创建jdbc的配置文件。(写一些测试数据)
jdbc.user=root
jdbc.password=atguigu
jdbc.url=jdbc:mysql://localhost:3306/ssm?serverTimezone=UTC
jdbc.driver=com.mysql.cj.jdbc.Driver
创建bean-jdbc.xml,开始测试。
<?xml version="1.0" encoding="UTF-8"?>
<beans xmlns="http://www.springframework.org/schema/beans"xmlns:xsi="http://www.w3.org/2001/XMLSchema-instance"xmlns:context="http://www.springframework.org/schema/context"xsi:schemaLocation="http://www.springframework.org/schema/beanshttp://www.springframework.org/schema/beans/spring-beans.xsdhttp://www.springframework.org/schema/contexthttp://www.springframework.org/schema/context/spring-context.xsd">
<!--    引入外部的数据源配置文件--><context:property-placeholder location="classpath:jdbc.properties"></context:property-placeholder>
<!--    通过数据源的文件将数据注入bean中-->
<!--    通过${}在数据源的配置文件中进行取值--><bean id="jdbcDriver" class="com.alibaba.druid.pool.DruidDataSource"><property name="url" value="${jdbc.url}"></property><property name="username" value="${jdbc.user}"></property><property name="password" value="${jdbc.password}"></property><property name="driverClassName" value="${jdbc.driver}"></property></bean>
</beans>
创建测试类进行测试。
import javax.sql.DataSource;
import java.sql.Connection;
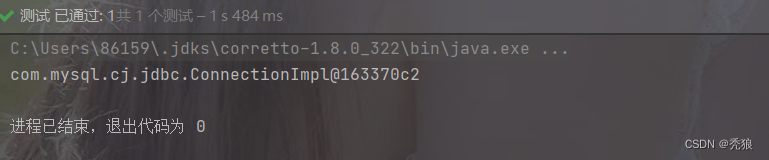
import java.sql.SQLException;@Testvoid test7() throws SQLException {ApplicationContext context = new ClassPathXmlApplicationContext("bean-jdbc.xml");DataSource bean = context.getBean(DataSource.class);Connection connection = bean.getConnection();System.out.println(connection);}测试结果:
bean的作用域
单例&多例
在bean中使用scope属性设置单例和多例,使用singleton/prototype。(默认使用单例)
生命周期
-
bean对象创建(调用无参构造器)
-
给bean对象设置属性
-
bean的后置处理器(初始化之前)
-
bean对象初始化(需在配置bean时指定初始化方法)
-
bean的后置处理器(初始化之后)
-
bean对象就绪可以使用
-
bean对象销毁(需在配置bean时指定销毁方法)
-
IOC容器关闭
进行测试 :
创建一个life类
public class Life {String name;//创建无参构造public Life() {System.out.println("1.创建一个空的实体类");}//初始化方法public void initMethod() {System.out.println("4.使用了初始化函数");}//销毁方法public void destroyMethod() {System.out.println("7.使用了摧毁函数");}public String getName() {return name;}public void setName(String name) {System.out.println("2.给属性进行赋值");this.name = name;}}
创建Spring的配置文件bean-life.xml
<?xml version="1.0" encoding="UTF-8"?>
<beans xmlns="http://www.springframework.org/schema/beans"xmlns:xsi="http://www.w3.org/2001/XMLSchema-instance"xsi:schemaLocation="http://www.springframework.org/schema/beans http://www.springframework.org/schema/beans/spring-beans.xsd"><bean id="life" class="com.huang.Life" init-method="initMethod" destroy-method="destroyMethod" scope="singleton"><property name="name" value="hfw"></property></bean>
</beans>
编写测试代码
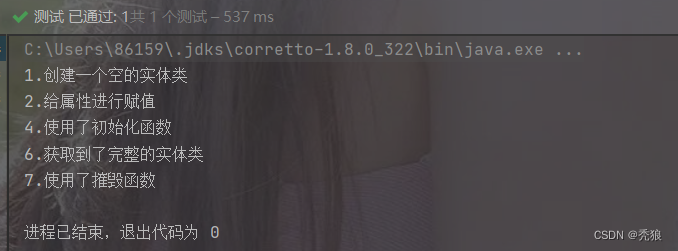
@Testvoid test1() {//ApplicationContext接口没有close方法,要使用ClassPathXmlApplicationContext实现类进行CLose操作ClassPathXmlApplicationContext context = new ClassPathXmlApplicationContext("bean-life.xml");Life life = (Life) context.getBean("life");System.out.println("6.获取到了完整的实体类");context.close();}测试结果
编写后置处理器
bean的后置处理器会在生命周期的初始化前后添加额外的操作,需要实现BeanPostProcessor接口,且配置到IOC容器中,需要注意的是,bean后置处理器不是单独针对某一个bean生效,而是针对IOC容器中所有bean都会执行。(默认使用BeanPostProcessor)
在BeanPostProcessor接口中存在俩个方法,就是对应初始化前后的方法。
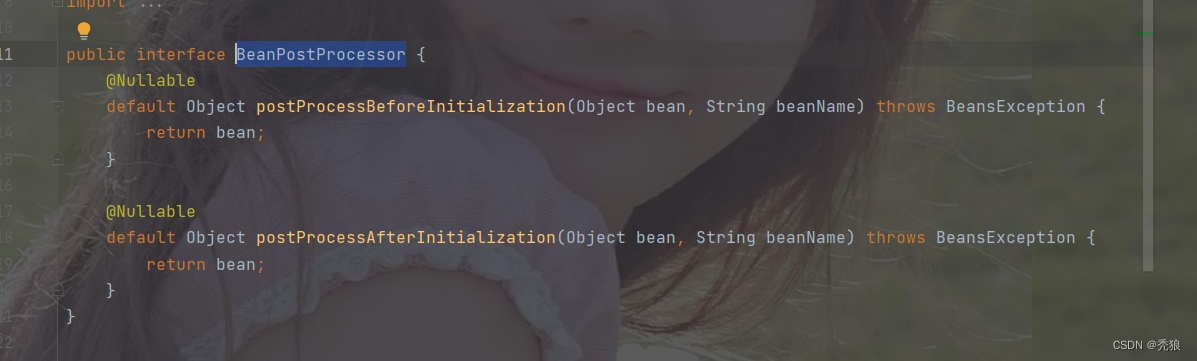
所以我们创建自己的后置处理器时就是去实现这两个方法。
import org.springframework.beans.BeansException;
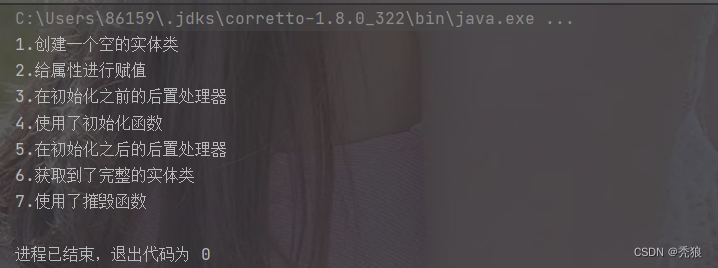
import org.springframework.beans.factory.config.BeanPostProcessor;public class MyBeanProcessor implements BeanPostProcessor {@Overridepublic Object postProcessBeforeInitialization(Object bean, String beanName) throws BeansException {System.out.println("3.在初始化之前的后置处理器");return bean;}@Overridepublic Object postProcessAfterInitialization(Object bean, String beanName) throws BeansException {System.out.println("5.在初始化之后的后置处理器");return bean;}
}
将MyBeanprocessor在bean-life.xml中进行配置。
<?xml version="1.0" encoding="UTF-8"?>
<beans xmlns="http://www.springframework.org/schema/beans"xmlns:xsi="http://www.w3.org/2001/XMLSchema-instance"xsi:schemaLocation="http://www.springframework.org/schema/beans http://www.springframework.org/schema/beans/spring-beans.xsd"><bean id="life" class="com.huang.Life" init-method="initMethod" destroy-method="destroyMethod" scope="singleton"><property name="name" value="hfw"></property></bean><bean id="myBeanProcessor" class="com.huang.MyBeanProcessor"></bean>
</beans>
进行测试,结果为下
FactoryBean(不是BeanFactory)
FactoryBean是Spring提供的一种整合第三方框架的常用机制。和普通的bean不同,配置一个FactoryBean类型的bean,在获取bean的时候得到的并不是class属性中配置的这个类的对象,而是getObject()方法的返回值。通过这种机制,Spring可以帮我们把复杂组件创建的详细过程和繁琐细节都屏蔽起来,只把最简洁的使用界面展示给我们。
配置factoryBean类
package com.huang.factoryBean;import org.springframework.beans.factory.FactoryBean;public class factoryBean implements FactoryBean<User> {@Overridepublic User getObject() throws Exception {
//可以在这类中完成实体类的操作,将具体的操作封装在该方法中User user = new User();user.setName("hfw");return user;}@Overridepublic Class<?> getObjectType() {return User.class;}
}
将该类在bean-factoryBean.xml配置文件中进行配置
<?xml version="1.0" encoding="UTF-8"?>
<beans xmlns="http://www.springframework.org/schema/beans"xmlns:xsi="http://www.w3.org/2001/XMLSchema-instance"xsi:schemaLocation="http://www.springframework.org/schema/beans http://www.springframework.org/schema/beans/spring-beans.xsd"><bean id="factoryBean" class="com.huang.factoryBean.factoryBean"></bean>
</beans>进行测试,最终我们会发现在获取该bean时会返回User对象,完成封装。
Spring 开启自动扫描的方法
在bean.xml中配置扫描注解的配置
<?xml version="1.0" encoding="UTF-8"?>
<beans xmlns="http://www.springframework.org/schema/beans"xmlns:xsi="http://www.w3.org/2001/XMLSchema-instance"xmlns:context="http://www.springframework.org/schema/context"xsi:schemaLocation="http://www.springframework.org/schema/beanshttp://www.springframework.org/schema/beans/spring-beans-3.0.xsdhttp://www.springframework.org/schema/contexthttp://www.springframework.org/schema/context/spring-context.xsd"><!--开启组件扫描功能-->
<!--    base-package对应的就是要扫描注解的包路径--><context:component-scan base-package="com.huang"><!--        要排除的扫描注解的如路径-->
<!--        <context:exclude-filter type="annotation" expression="xxx.xxx.xxx"/>-->
<!--要排除扫描注解的类--><!--<context:exclude-filter type="assignable" expression="xxx.xxx.xxx"/>--><!--        仅扫描的包路径-->
<!--        <context:include-filter type="annotation" expression="xxx.xxx.xxx"/>--><!--        仅扫描的类--><!--<context:include-filter type="assignable" expression="xxx.xxx.xxx"/>--></context:component-scan>
</beans
spring中的@Autowired可以使用在 属性上,set方法上,构造方法上,构造方法的形参上,注解上。
如果类中只存在一个构造方法时,可以省略@Autowired。
如果在使用@Autowired的属性是接口且存在多个实现类的话,我们就需要使用@Qualifier(value="bean中对应的id"),我们可以将@Autowired当作ByType,@Resource当作ByName,如果Autowired要达到ByNam的效果就要配合@Qualifier使用 。
实现全注解开发
创建配置类
import org.springframework.context.annotation.ComponentScan;@org.springframework.context.annotation.Configuration
@ComponentScan
public class Configuration {
}
使用ApplicationContext的实现类AnnotationConfigApplicationContext
@org.junit.jupiter.api.Testvoid test2() {ApplicationContext context = new AnnotationConfigApplicationContext(Configuration.class);}手写IoC
Java反射回顾测试例子
import java.lang.reflect.Constructor;
import java.lang.reflect.Field;
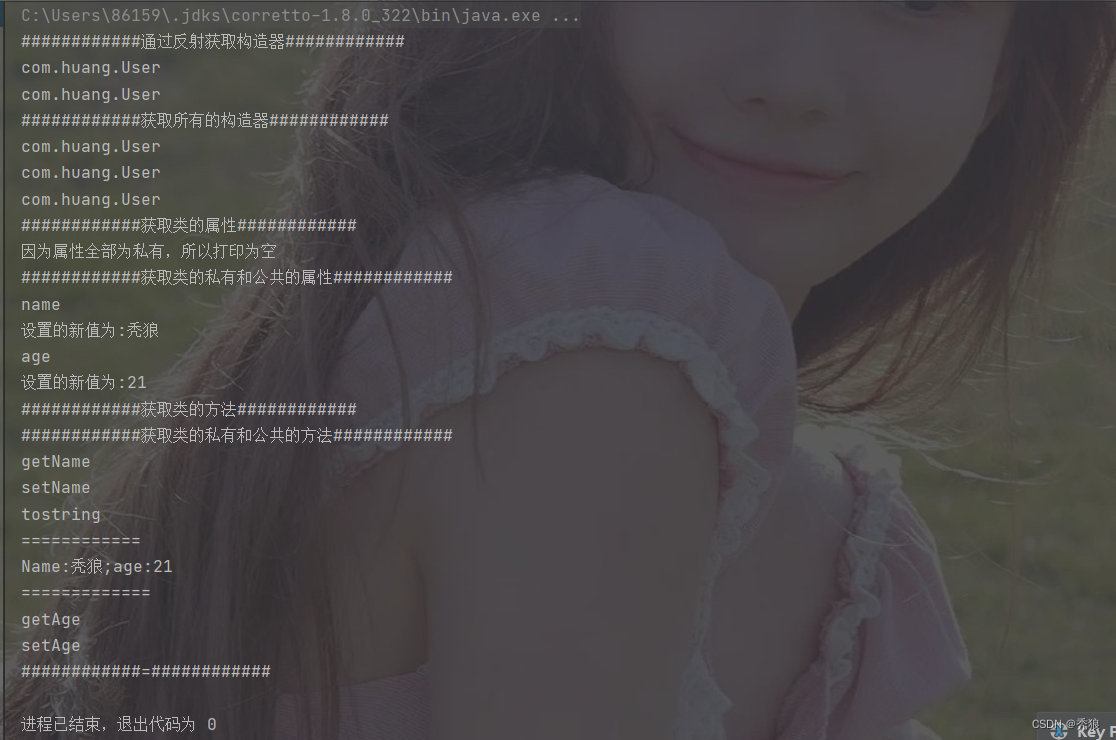
import java.lang.reflect.Method;public class reflectTest {@Testpublic void Test1() throws Exception {//直接通过.class获取该类的classClass clazz1 = User.class;//通过new出来的对象调用getClass方法Class clazz2 = new User().getClass();//通过class.forName获取Class对象Class clazz3 = Class.forName("com.huang.User");//创建一个实体类后续需要使用User user = new User();System.out.println("############通过反射获取构造器############");//通过反射获取公共的构造器Constructor[] constructors = clazz1.getConstructors();for (Constructor item : constructors) {System.out.println(item.getName());//使用构造器的newInstance()创建实例}
// System.out.println("############=############");System.out.println("############获取所有的构造器############");//通过反射获取私有和公有的构造器Constructor[] declaredConstructors = clazz1.getDeclaredConstructors();for (Constructor item : declaredConstructors) {System.out.println(item.getName());}System.out.println("############获取类的属性############");Field[] fields = clazz1.getFields();System.out.println("因为属性全部为私有,所以打印为空");for (Field item : fields) {System.out.println(item.getName());}System.out.println("############获取类的私有和公共的属性############");Field[] declaredFields = clazz1.getDeclaredFields();for (Field item : declaredFields) {System.out.println(item.getName());if(item.getName().equals("name")) {//设置访问权限为true,这样我们才可以设置对应的属性item.setAccessible(true);item.set(user, "秃狼");System.out.println("设置的新值为:" + user.getName());}if(item.getName().equals("age")) {//设置访问权限为true,这样我们才可以设置对应的属性item.setAccessible(true);item.set(user, 21);System.out.println("设置的新值为:" + user.getAge());}}System.out.println("############获取类的方法############");Method[] methods = clazz1.getMethods();for (Method item : methods) {System.out.println(item);}System.out.println("############获取类的私有和公共的方法############");Method[] declaredMethods = clazz1.getDeclaredMethods();for (Method item : declaredMethods) {System.out.println(item.getName());if(item.getName().equals("tostring")) {//因为该方法是私有类型的,所以需要设置权限//这里使用了私有方法item.setAccessible(true);System.out.println("============");item.invoke(user);System.out.println("=============");}}System.out.println("############=############");}
}
这里的User为简单的类,可以自行创建
public class User {private String name;private int age;public User(String name, int age) {this.name = name;this.age = age;}public User() {}private User(String name) {this.name = name;}public String getName() {return name;}public void setName(String name) {this.name = name;}public int getAge() {return age;}public void setAge(int age) {this.age = age;}private void tostring() {System.out.println("Name:" + this.name + ";" + "age:" + this.age);}
}
测试结果为下
开始手写IoC
手写例子
这里设置的情况为每个类最多只有可以实现的接口,IoC为单例的情况。
创建两个注释:
Bean(转载注释)
import java.lang.annotation.ElementType;
import java.lang.annotation.Retention;
import java.lang.annotation.RetentionPolicy;
import java.lang.annotation.Target;//设置作用域:作用在类上
@Target(ElementType.TYPE)
@Retention(RetentionPolicy.RUNTIME)
public @interface Bean {
}
rush(注入注释)
import java.lang.annotation.ElementType;
import java.lang.annotation.Retention;
import java.lang.annotation.RetentionPolicy;
import java.lang.annotation.Target;//设置作用域:设置为作用在属性上
@Target({ElementType.FIELD})
@Retention(RetentionPolicy.RUNTIME)
public @interface rush {
}
在包中创建三层架构:Dao,Service,Controller,分别创建一个接口和对应的Impl实现类。
这里的ApplicationContext就是包含一个getBean的接口,就是模仿Spring中ApplicationContext。
import com.huang.Annotation.Bean;
import com.huang.Annotation.rush;import java.io.File;
import java.lang.reflect.Field;
import java.net.URL;
import java.net.URLDecoder;
import java.util.Enumeration;
import java.util.HashMap;
import java.util.Map;
import java.util.Set;public class AnnotationApplicationContext implements ApplicationContext{//bean的本质就是将对应的class和实例对象存放在map中,放和取就是通过对应的注解完成private Map<Class, Object> beanFactory = new HashMap<>();
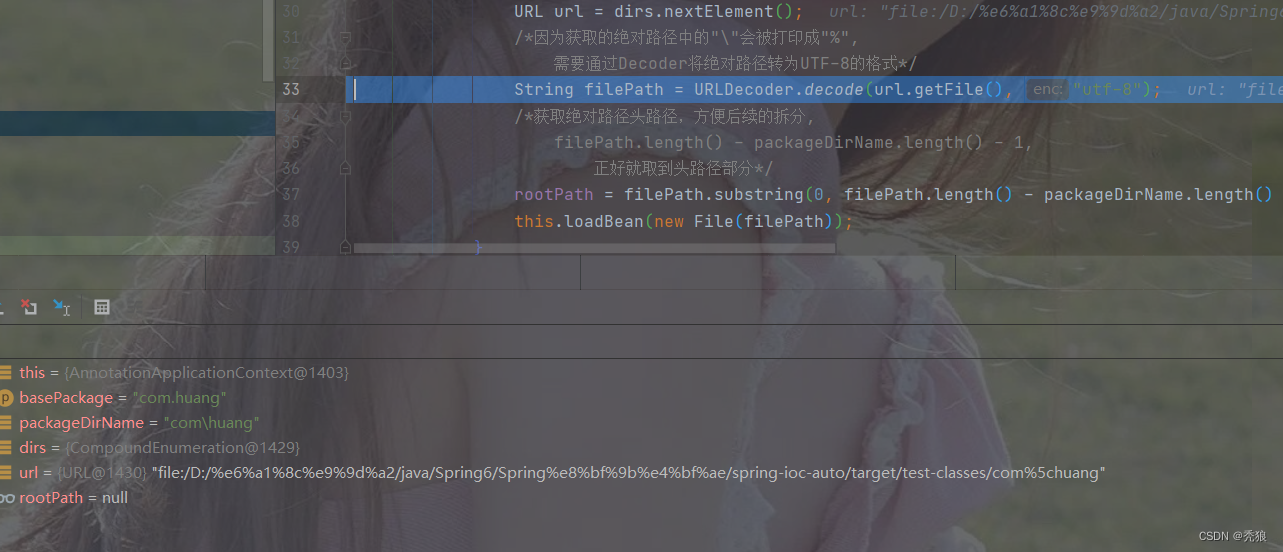
//绝对路径的头路径private String rootPath;@Overridepublic Object getBean(Class clazz) {return beanFactory.get(clazz);}public AnnotationApplicationContext(String basePackage) {/*basePackage中的路径为指定类的当前路径,并且要进行格式转换后获取绝对路径*/String packageDirName = basePackage.replaceAll("\\.", "\\\\");try {//通过当前线程获取对应的绝对路径Enumeration<URL> dirs = Thread.currentThread().getContextClassLoader().getResources(packageDirName);while (dirs.hasMoreElements()) {URL url = dirs.nextElement();/*因为获取的绝对路径中的"\"会被打印成"%",需要通过Decoder将绝对路径转为UTF-8的格式*/String filePath = URLDecoder.decode(url.getFile(), "utf-8");/*获取绝对路径头路径,方便后续的拆分,filePath.length() - packageDirName.length() - 1,正好就取到头路径部分*/rootPath = filePath.substring(0, filePath.length() - packageDirName.length() - 1);//装载beanthis.loadBean(new File(filePath));//注入属性this.loadRush();}} catch (Exception e) {e.printStackTrace();}}private void loadBean(File file) throws ClassNotFoundException, IllegalAccessException, InstantiationException {//进行判断插入的文件是否为文件夹if(file.isDirectory()) {//获取去子文件,如果没有就说明文件夹为空,直接返回空值File[] files = file.listFiles();if(files.length == 0 || files == null) {return ;}for (File child : files) {if(child.isDirectory()) {//如果子文件还是文件夹的话,就直接使用递归调用loadBean函数loadBean(child);} else {//将子文件的绝对路径设置截取为类路径String pathWithClass = child.getAbsolutePath().substring(rootPath.length());//获取类的路径后,需要判断是否为.class文件再进行操作if(pathWithClass.endsWith(".class")) {//如果是,就再将类路径进行格式转化String fullName = pathWithClass.replaceAll("\\\\", ".").replace(".class", "");//通过类路径获取反射Class<?> aClass = Class.forName(fullName);//判断该反射是否为接口的反射类,如果不是我们才进行判断类上是否有指定的注解if(!aClass.isInterface()) {//获取类上的注解,判断这些注解是否有指定的注解Bean annotation = aClass.getAnnotation(Bean.class);if(annotation != null) {//instance作为beanFactory的值Object instance = aClass.newInstance();//如果该类存在实现的接口就用接口作为键,这里就不考虑存在多个接口了if(aClass.getInterfaces().length > 0) {Class<?>[] interfaces = aClass.getInterfaces();//这里就考虑存在一个接口beanFactory.put(aClass.getInterfaces()[0], instance);} else {//如果不存在就之家用本类beanFactory.put(aClass, instance);}}}}}}} else {System.out.println("不是文件夹,输入有误");return ;}}private void loadRush() throws IllegalAccessException {//遍历mapSet<Map.Entry<Class, Object>> entries = beanFactory.entrySet();for (Map.Entry<Class, Object> entry : entries) {//获取实体类(这里就只考虑单例)Object obj = entry.getValue();Class key = obj.getClass();//获取所有的属性Field[] declaredFields = key.getDeclaredFields();for (Field field : declaredFields) {//设置访问权限field.setAccessible(true);//判断该属性是否有对应的注解rush annotation = field.getAnnotation(rush.class);if(annotation != null) {//就对实体类的属性进行赋值field.set(obj, beanFactory.get(field.getType()));//完成注入}}}}
}
在代码中 String filePath = URLDecoder.decode(url.getFile(), "utf-8")的作用是格式化路径,如果不加将会出现下面的情况。(/被%替代)
测试代码
//要到对自己写的包
import com.huang.ApplicationContext.AnnotationApplicationContext;
import com.huang.ApplicationContext.ApplicationContext;
import com.huang.Controller.UserController;public class TestUser {public static void main(String[] args) {ApplicationContext context = new AnnotationApplicationContext("com.huang");UserController userController = (UserController) context.getBean(UserController.class);userController.run();}
}
测试结果为下:

最终完成手写IoC。